Ingredients
- Egg: 1 large (room temperature is best for even mixing)
- Sugar: 3 tablespoons (this adds sweetness to the pancakes)
- Vanilla Sugar: 8g (for an aromatic touch)
- Oil: 2 tablespoons (plus extra for cooking; can use vegetable or coconut oil)
- : 125g (preferably plain or Greek for added creaminess)
- Milk: 80ml (to adjust the batter consistency)
- Flour: 180g (all-purpose flour is ideal, but whole wheat can be substituted for a healthier option)
- Baking Powder: 10g (this is what gives the pancakes their light and airy texture)
- Caster Sugar: (for sprinkling on top, optional)
Instructions
- Prepare the Batter:
- Whisk Ingredients Together: Begin by cracking the egg into a mixing bowl. Whisk in 3 tablespoons of regular sugar and 8g of vanilla sugar until the mixture is well combined and slightly frothy. This helps to incorporate air into the batter, resulting in fluffier pancakes.
- Add Wet Ingredients: Next, introduce 2 tablespoons of oil, 125g of yogurt, and 80ml of milk into the egg mixture. Use a whisk or spatula to mix everything until smooth and well blended. The yogurt not only adds flavor but also contributes to the pancakes’ moistness.
- Incorporate Dry Ingredients: Sift in 180g of flour and 10g of baking powder into the wet mixture. Sifting helps to prevent lumps and ensures even distribution of the baking powder. Stir gently until the batter is smooth and free of lumps. Be careful not to overmix, as this can lead to tough pancakes—just mix until combined!
- Cook the Pancakes:
- Heat Your Pan: Place a non-stick skillet or frying pan over medium heat. Once heated, lightly grease the pan with a bit of oil. This will help the pancakes cook evenly and prevent sticking.
- Pour the Batter: Using a ladle or measuring cup, pour a small amount of batter into the pan to form a pancake. You can choose to make them small or large depending on your preference—just keep in mind that smaller pancakes cook faster.
- Watch for Bubbles: Cook the pancake until bubbles form on the surface and the edges begin to set, which usually takes about 2-3 minutes. This is an indication that it’s time to flip.
- Flip and Finish Cooking: Carefully flip the pancake using a spatula and cook the other side until it turns golden brown, approximately 1-2 more minutes. Repeat this process with the remaining batter, adding more oil to the pan as necessary to keep things non-stick.
- Serve:
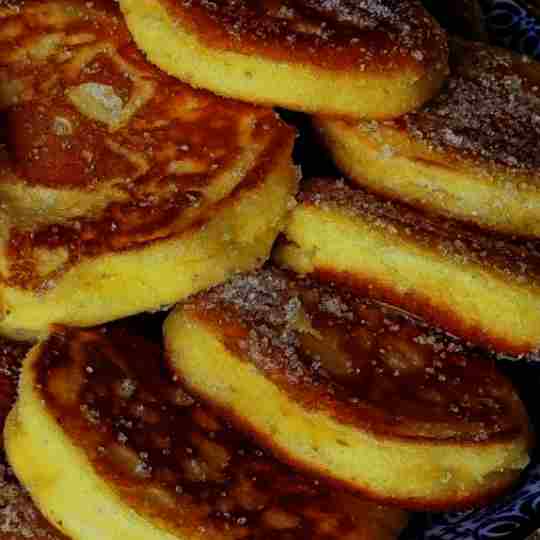
- Add Sweetness: Once the pancakes are cooked, sprinkle them lightly with caster sugar for an added touch of sweetness. This will enhance their flavor and give them a lovely finish.
- Presentation: Serve the pancakes warm, stacked on a plate, and consider adding a few toppings for extra flair. Fresh fruits like strawberries, blueberries, or banana slices can add color and freshness. A drizzle of honey or maple syrup complements the pancakes perfectly, adding a delightful sweetness. You might even consider a dollop of whipped cream or yogurt for a rich, creamy contrast.
- Experiment with Flavors: Feel free to experiment with different flavors! You can add chocolate chips, chopped nuts, or even spices like cinnamon or nutmeg directly into the batter for a unique twist.
Additional Tips:
- Make Ahead: If you’re short on time, you can prepare the batter the night before. Store it in the and give it a good stir before cooking. The flavors will develop nicely overnight!
- Leftovers Storage: These pancakes are best enjoyed fresh but can be stored in an in the for up to 2 days. Reheat them in a skillet or microwave for a quick breakfast on the go.
- Freezing for Later: If you make a large batch, consider freezing the pancakes. Let them cool completely, then place them in a single layer on a baking sheet until frozen solid. Transfer them to a freezer bag or container for up to 2 months. To reheat, just pop them in the toaster or microwave.
Enjoy!
